
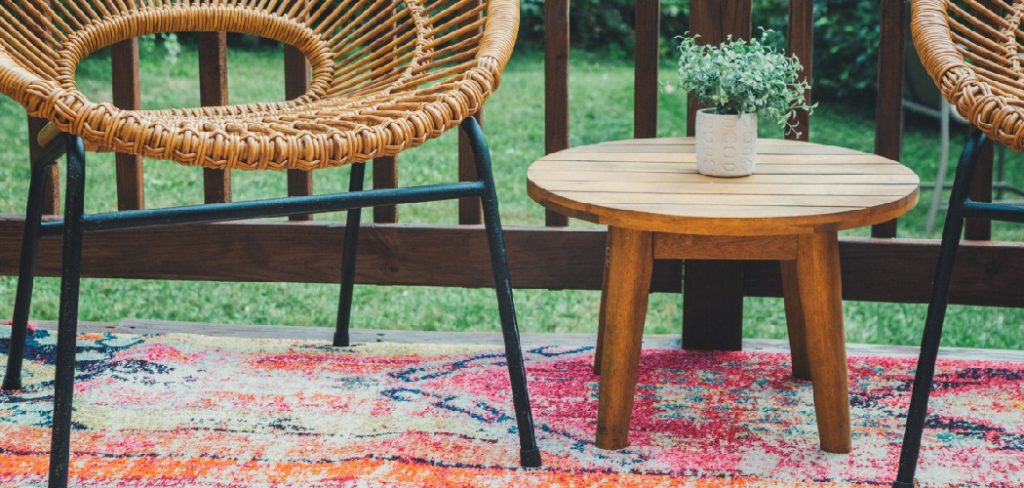
A small outdoor table is perfect for patios, balconies, gardens, or cozy outdoor corners. Compact, functional, and stylish, it’s an ideal project for beginners who want quick results with durable, weatherproof materials.
This guide walks you through planning, cutting, assembling, sanding, finishing, and optional customizations, giving you a sturdy outdoor table that lasts.
Why Build a Small Outdoor Table?
Creating your own outdoor table allows you to:
- Maximize small outdoor spaces with a perfectly sized table.
- Choose wood and finishes that withstand weather and sun exposure.
- Learn woodworking basics — measuring, cutting, joining, and finishing.
- Save money while crafting a unique, personal piece.
Even if this is your first woodworking project, a small outdoor table is manageable, fast, and satisfying.
Tools and Materials You’ll Need
Materials List
| Component | Material | Dimensions | Quantity | Notes |
|---|---|---|---|---|
| Tabletop | Cedar, Pine, or Treated Wood | 18–24” square or round | 1 | Smooth, flat, or pre-cut board |
| Legs | 2×2 or 2×3 Lumber | 16–18” | 4 | Sturdy for outdoor use |
| Aprons / Rails | 1×3 Lumber | Tabletop length minus 2–3” | 4 | Connects legs and supports tabletop |
| Screws | 1¼–1½” exterior wood screws | — | 16–20 | Galvanized or stainless steel recommended |
| Wood Glue | Exterior-grade | — | — | Optional for extra stability |
| Sandpaper | 80, 120, 220 grit | — | — | For smooth finishing |
| Finish | Exterior Stain, Sealer, or Spar Urethane | — | — | Protects wood from sun and moisture |
© woodhint.com
Tip:
You can download this cut list as a printable sheet for your workshop.
Tools List
- Tape Measure & Speed Square
- Hand Saw or Circular Saw
- Power Drill & Bits
- Clamps
- Orbital Sander or Sanding Block
- Paintbrush or Cloth for Finishing
A level ensures your table sits evenly on outdoor surfaces.
Step 1: Plan Your Small Outdoor Table
Recommended Dimensions:
| Table Type | Height | Width | Length |
|---|---|---|---|
| Square / Bistro Table | 16–18” high | 18–24” | 18–24” |
| Rectangle Table | 16–18” high | 16–18” | 24–30” |
© woodhint.com
Decide tabletop shape (square, rectangle, or round), leg placement, and spacing for outdoor use.
Step 2: Cut the Wood
- Cut four legs to desired height.
- Cut four aprons (rails) to fit between legs.
- Cut tabletop to final dimensions.
- Optional: cut support blocks for corner reinforcement.
Pro Tip:
Use a stop block to maintain consistent leg lengths. Sand edges lightly after cutting.
Step 3: Assemble the Frame
- Lay two legs flat with a short apron between them near the top.
- Apply exterior wood glue if desired.
- Drill pilot holes and drive screws.
- Repeat for the other side.
- Connect end assemblies with long aprons to form a rectangle.
- Check corners with a square for a level frame.
- Optional: add diagonal braces for stability.
Step 4: Attach the Tabletop
- Center the frame on the underside of the tabletop.
- Drill pilot holes through aprons into the tabletop.
- Drive screws carefully to avoid splitting the wood.
- Leave a small gap (~1/8”) for wood expansion in outdoor conditions.
Tip:
Pre-drill with corrosion-resistant screws for longevity.
Step 5: Sanding and Weatherproofing
Sanding
- Start with 80-grit for rough edges.
- Progress to 120-grit and finish with 220-grit for smooth surfaces.
Weatherproof Finishing Options
- Clear exterior polyurethane or spar urethane for water and UV protection.
- Exterior stain for color and additional protection.
- Apply two to three coats, allowing proper drying time.
Regular maintenance (cleaning and re-sealing) prolongs your table’s life outdoors.
Step 6: Optional Design Variations
1. Round Outdoor Table
- Ideal for small patios.
- Use circular top, same leg frame with support blocks.
2. Folding Outdoor Table
- Add hinge mechanism for easy storage.
- Great for compact spaces or temporary setups.
3. Bistro-Style Table
- Small square top, decorative legs, optional umbrella hole.
- Perfect for coffee or snack areas.
Common Beginner Mistakes
| Mistake | Cause | Solution |
|---|---|---|
| Wobbly legs | Corners not square | Clamp and check diagonals |
| Wood splits | Screws without pilot holes | Always drill pilot holes |
| Uneven tabletop | Frame misalignment | Measure carefully and level before attaching |
| Rough finish | Skipped sanding | Sand progressively 80→220 grit |
| Wood warping | No weatherproof finish | Apply outdoor sealant and maintain |
© woodhint.com
Estimated Cost and Time
| Item | Estimated Cost |
|---|---|
| Wood (Cedar, Pine, or Treated Lumber) | $25–$50 |
| Screws & Glue | $5–$10 |
| Sandpaper & Finish | $10–$20 |
| Total Cost | $40–$80 |
Build Time:
- Cutting & assembly: 2–2.5 hours
- Sanding & finishing: 1–2 hours
- Drying time: 12–24 hours
© woodhint.com
A small outdoor table can be completed in a weekend, even for beginners.
Your Small Outdoor Table Build
Building a small outdoor table is practical, beginner-friendly, and rewarding. With clear steps, durable materials, and protective finishing, you’ll have a compact, functional, and stylish table for your patio, balcony, or garden.
Once you master this project, try benches, folding tables, or dining tables for more woodworking experience.
To explore different types of tables, design ideas, and full woodworking plans, check out our complete guide: Build Wooden Table: Types, Plans and Design.