

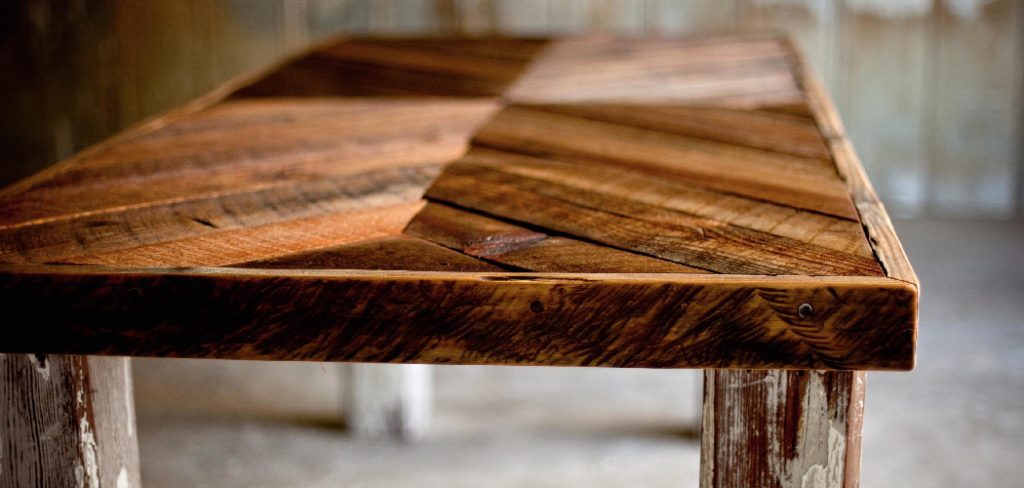
A reclaimed wood dining table combines sustainability with charm. Using rescued wood gives your table a unique character, rich grain patterns, and a rustic or industrial style that new lumber can’t match.
This guide walks you through selecting reclaimed wood, preparing boards, building the frame, assembling the tabletop, sanding, finishing, and optional design variations for beginners.
Why Choose Reclaimed Wood for Your Dining Table?
Building with reclaimed wood allows you to:
- Save money and reduce waste by reusing quality timber.
- Create a table with character — knots, nail holes, and unique grain patterns add personality.
- Learn beginner woodworking skills including measuring, cutting, joining, and finishing.
- Customize size, style, and finish to fit your dining space.
Even if you’re a beginner, a reclaimed wood table is rewarding, durable, and visually stunning.
Tools and Materials You’ll Need
Materials List
| Component | Material | Dimensions | Quantity | Notes |
|---|---|---|---|---|
| Reclaimed Wood Boards | Oak, Pine, Barn Wood, or Pallet Wood | 1–2” thick | Enough for tabletop | Ensure boards are straight and clean |
| Table Frame | Pine, Oak, or 2×4 Lumber | — | Legs + Aprons | Supports tabletop |
| Screws | 2–3” wood screws | — | 16–20 | Pre-drill to prevent splitting |
| Wood Glue | Exterior or Interior Grade | — | — | Optional for extra stability |
| Sandpaper | 80, 120, 180, 220 grit | — | — | For smooth finishing |
| Finish | Polyurethane, Oil, or Wax | — | — | Protects wood and enhances grain |
| Clamps | — | — | — | Keeps boards tight during assembly |
© woodhint.com
Tip:
You can download this cut list as a printable sheet for your workshop.
Tools List
- Tape Measure & Speed Square
- Circular Saw, Jigsaw, or Table Saw
- Power Drill & Bits
- Orbital Sander or Sanding Block
- Clamps
- Paintbrush or Cloth for finishing
- Level
Safety first: Wear eye protection and gloves when cutting and sanding reclaimed wood.
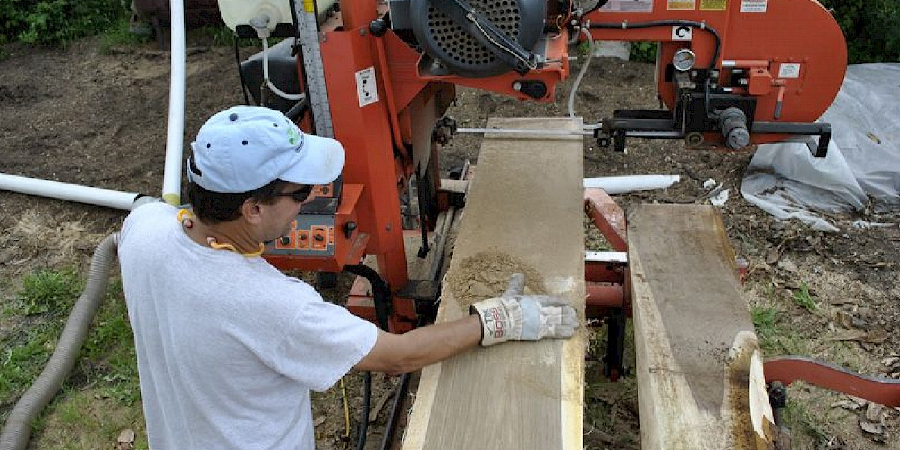
Step 1: Choose and Prepare Your Reclaimed Wood
- Select boards free of rot or severe cracks.
- Remove nails, screws, and staples using a hammer or pliers.
- Flatten the boards using a planer or hand plane.
- Sand rough edges and surfaces starting with 80-grit, progressing to 120–180 grit.
Pro Tip:
Boards with natural imperfections add rustic charm, but ensure structural integrity.
Step 2: Build the Table Frame
- Cut legs and aprons to your desired table dimensions.
- Assemble legs and aprons into a stable rectangle using screws and wood glue if desired.
- Ensure corners are square with a speed square and frame is level.
- Optional: add cross braces for extra stability.
Step 3: Assemble the Tabletop
- Lay boards side by side, ensuring tight alignment.
- Apply wood glue between boards.
- Use clamps to hold boards together while glue dries.
- Drill pilot holes and drive screws through aprons or support battens to secure boards.
- Optional: add breadboard ends for a professional look and to prevent warping.
Tip:
Always allow small gaps for natural wood expansion if needed.
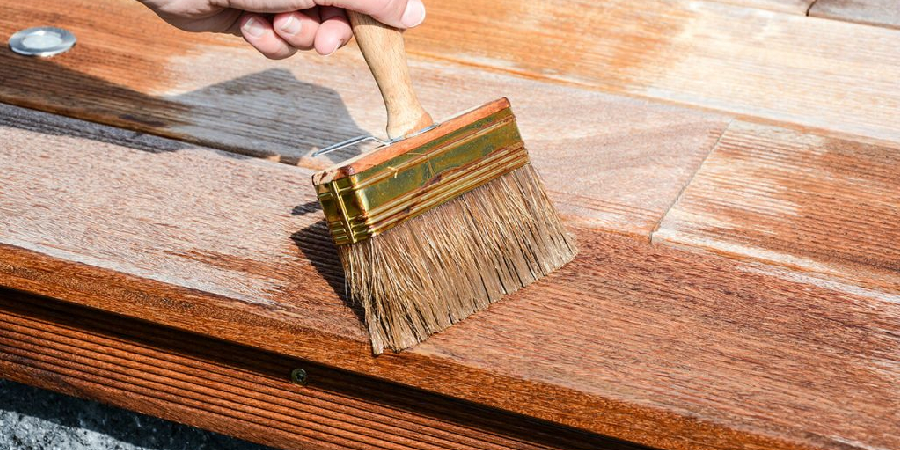
Step 4: Sanding and Finishing the Reclaimed Wood
Sanding
- Start with 80-grit for rough surfaces.
- Progress through 120, 180, and 220-grit for smoothness.
- Remove dust between sanding steps.
Finishing
- Oil finish (tung or linseed) enhances grain and maintains natural look.
- Polyurethane adds protection from spills and daily use.
- Apply two to three coats for optimal protection.
- Let each coat dry fully and sand lightly with 220-grit between coats.
Tip:
Consider eco-friendly or low-VOC finishes to keep the reclaimed wood environmentally friendly.
Design Variations
1. Rustic Farmhouse Table
- Keep natural wood edges, lightly sanded, with a matte finish.
2. Industrial Dining Table
- Combine reclaimed wood tabletop with metal legs or braces.
3. Modern Minimalist Table
- Sand edges square and finish with a clear polyurethane coat for a clean look.
Common Beginner Mistakes
| Mistake | Cause | Solution |
|---|---|---|
| Loose joints | Screws not pre-drilled | Drill pilot holes first |
| Warped boards | Boards not flattened | Plane and sand boards before assembly |
| Rough finish | Skipped sanding | Follow sanding progression 80→220 grit |
| Uneven tabletop | Frame not level | Check frame with level before attaching boards |
| Weak structure | Insufficient cross supports | Add braces beneath tabletop |
© woodhint.com
Estimated Cost and Time
| Item | Estimated Cost |
|---|---|
| Reclaimed Wood Boards | $50–$100 |
| Frame Lumber & Screws | $20–$50 |
| Sandpaper & Finish | $15–$30 |
| Total Cost | $85–$180 |
Build Time:
- Wood prep & sanding: 2–3 hours
- Frame assembly: 1–2 hours
- Tabletop assembly: 1–2 hours
- Finishing: 2–3 hours
© woodhint.com
A reclaimed wood dining table can be completed over a weekend, even for beginners.
Your First Reclaimed Wood Dining Table
Building a reclaimed wood dining table is sustainable, creative, and beginner-friendly. With careful wood selection, proper prep, and clear steps, you’ll have a durable, stylish centerpiece for your dining area.
Once you master reclaimed wood tables, you can experiment with larger dining tables, live-edge designs, or mixed-material frames.
To explore more creative options and detailed blueprints for different table types, visit our Build Wooden Table: Types, Plans and Design guide — it covers everything from classic dining tables to modern styles with comprehensive plans and joinery ideas.