
A perfect cut is the foundation of a perfect project. If you can cut wood accurately, you can build anything. I believe that mastering wood cutting is the single most important skill you will learn. It is not about owning the biggest saw; it is about choosing the right tool and knowing how to use it safely.
This guide will walk you through every cut you need to know. We will cover the core techniques, the essential tools, and the principles that ensure safety and precision every time. Cutting is only one part of the craft. To see how it fits alongside joinery, shaping, finishing, and more, explore my complete guide to woodworking techniques.

Essential Wood Cutting Tools: An Overview
The type of cut you make depends entirely on the tool you use. You need the right tool to get the right result.
|
Tool |
Primary Use |
Key Benefit |
|---|---|---|
|
Table Saw |
Rip Cutting, Precision Joinery |
Best for making long, straight cuts with the grain. |
|
Miter Saw |
Crosscutting, Miter Cuts, Bevels |
Best for cutting boards to exact length and angle. |
|
Circular Saw |
Rough Cutting, Breaking Down Panels |
Portable and great for straight cuts on large sheet goods. |
|
Jigsaw |
Curved Cuts, Irregular Shapes |
Best for cutting shapes and curves in the middle of a board. |
|
Hand Saws |
Fine Joinery, Small Cuts |
Allows maximum control and precision in delicate work. |
Hand Tools vs. Power Tools
Hand Saws (like a backsaw or coping saw) are perfect for fine work, like cutting tenons or delicate curves. Circular Saws and Miter Saws are your power workhorses. They handle the heavy work of dimensioning lumber quickly and accurately.
Foundational Wood Cutting Principles
Before you make any cut, you must prepare the material and the tool. These three principles are the foundation of all accurate work.
- Accurate Marking and Measuring: Measure twice, cut once. Use a sharp pencil and a reliable square. Mark the waste side of your line clearly. This ensures you cut on the correct side, leaving the finished piece exactly the right size.
- Understanding Wood Grain: Cutting with the grain (a rip cut) is generally easier and faster. Cutting across the grain (a crosscut) requires a finer-toothed blade to prevent tear-out on the fibers.
- Setting Up Safely: You must always secure your workpiece. Use clamps to hold the wood tightly to your workbench or saw table. Wood that moves is dangerous and will never give you an accurate cut.
Basic Wood Cutting Techniques for Beginners
Every project is built from these core cuts. I recommend you master these first.
The Core Cuts
- Crosscutting: This is cutting the wood across the grain to cut a board to its final length. Use a miter saw or a circular saw guided by a square edge.
- Rip Cutting: This is cutting the wood with the grain to cut a board to its final width. The table saw is the best tool for this because it uses a fence to guide the cut precisely.
- Miter Cutting: This is a cut made at an angle across the width of the board, usually 45 degrees. Use this cut to create corner joints for picture frames or baseboards.
- Bevel Cutting: This cut slopes the edge of the wood, cutting through the thickness. A bevel is often used for decorative purposes or to create sloped edges.
Specialty Cuts for Joinery
These are essential for making strong connections between pieces of wood.
- Dado Cuts: A dado is a square channel or groove cut across the grain. The end of another board fits into this channel. This cut is perfect for shelves in bookcases because it offers strength and stability.
- Rabbet Cuts: A rabbet is a square channel cut along the edge of a board. It is used to create a strong joint, often for the back of a cabinet or to join the sides of a box.
Curved and Irregular Cuts
When you need to deviate from a straight line, you need a specific tool.
- Curved Cuts: Use a jigsaw for tight curves and a band saw for wider, smoother curves. Always draw your line first and take your time.
Mastering Specific Tools: Step-by-Step Guides
Precision comes from respecting the tool and using the correct method.
Table Saw Cutting Techniques
The table saw is the most valuable tool in the shop.
- Accurate Rip Cuts: Set your fence to the exact width you need. Ensure the board is flat against the fence and the table. Feed the wood steadily and smoothly. Always use a push stick to keep your hands safe and away from the blade.
- Dado Cuts with a Dado Stack: A dado stack replaces the standard blade with a set of chippers that cut a wide groove. Adjust the stack’s width to match the thickness of the shelf you are fitting.
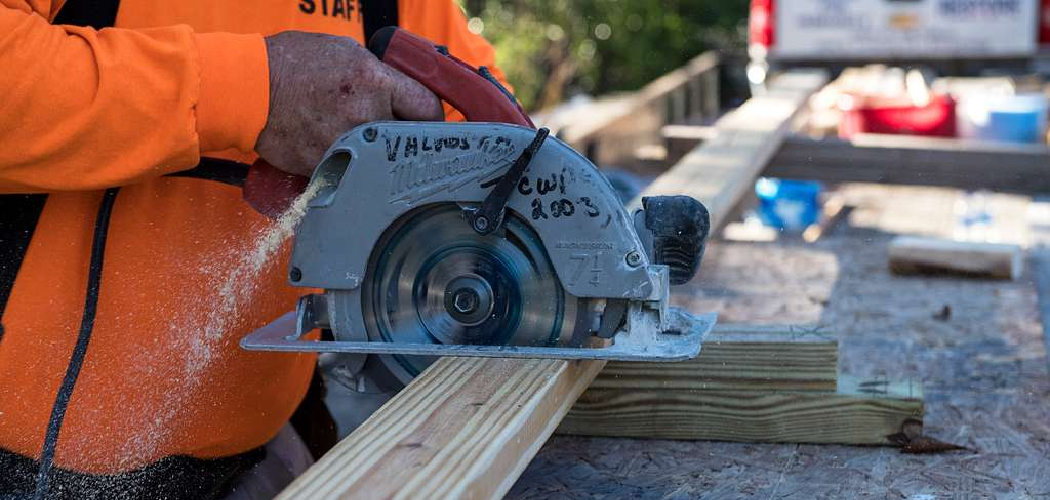
Circular Saw Cutting Techniques
The circular saw is portable and great for breaking down large panels.
- Straight Cuts: Never cut freehand. Clamp a straight edge (like a level or a factory-made guide) across your workpiece. Guide the saw base firmly against the straight edge for a perfectly straight line.
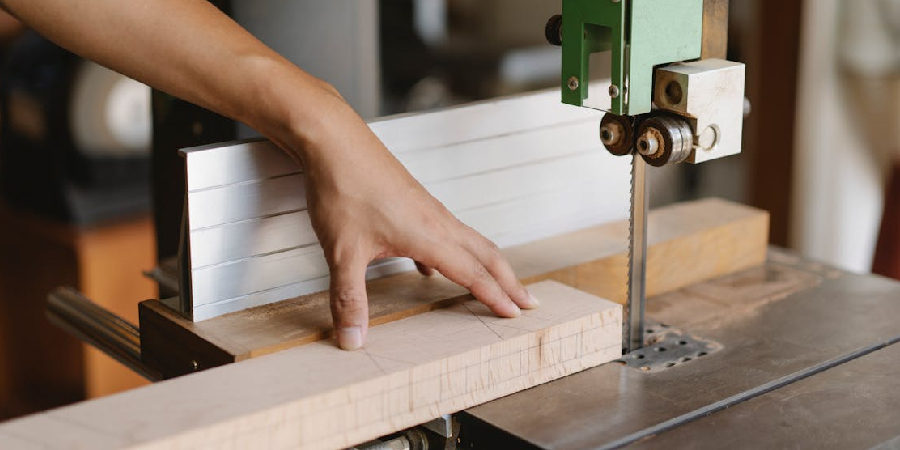
Jigsaw and Band Saw Cutting Techniques
- Cutting Curves: Use a fine-toothed blade on your jigsaw or band saw. Feed the material slowly and let the blade do the work. Do not force the tool, especially around tight corners, as this can break the blade.
Safety Practices for All Cutting Operations
I cannot stress this enough: A sharp tool used correctly is a safe tool.
- Personal Protective Equipment (PPE): Always wear safety glasses to protect your eyes from flying debris. Wear hearing protection when using loud power tools.
- Workpiece Clamping: Never hold a small piece of wood by hand while cutting it. Clamp it securely to a workbench or use a jig.
- Kickback Prevention: Kickback happens when the blade catches the wood and throws it back at you. On a table saw, this often happens when the wood binds between the blade and the fence. Always use a splitter or riving knife to prevent the wood from pinching the back of the blade.
Conclusion
The journey to great woodworking starts with confidence in your cuts. Remember to measure precisely, secure your material, and always prioritize safety. Once you master the fundamentals of crosscutting, ripping, and joinery cuts, you can build anything you imagine.
Go measure and cut with confidence!
Wood Cutting Techniques FAQs
Q: What is the most common mistake a beginner makes when cutting wood?
A: The most common mistake is a lack of focus on accurate measuring and marking. Many beginners cut right on the line instead of cutting to leave the line intact. You must always mark your cut on the waste side of the line, leaving the line itself on the piece you want to keep.
Q: How can I reduce tear-out when crosscutting on a saw?
A: You can reduce tear-out—the chipping of fibers—by using a blade with a higher tooth count and by applying a piece of masking tape over the cut line before you saw. The tape holds the fibers down as the blade exits the wood, which results in a much cleaner cut.
Q: Why do I need a riving knife or splitter on my table saw?
A: You need a riving knife or a splitter for safety and accuracy. This device rides just behind the blade and prevents the wood you are cutting from pinching the blade, which is the most common cause of dangerous kickback. Kickback can ruin a piece of wood and cause serious injury.
Q: Should I cut a curve with a circular saw?
A: Absolutely not. A circular saw is designed only for straight line cuts. Attempting to cut a curve with a circular saw is dangerous and will cause the blade to bind, which can result in severe kickback. You must use a jigsaw or a band saw for any curved cut.
Q: What is the difference between a dado and a rabbet cut?
A: A dado is a square channel cut across the grain in the middle of a board, often used to hold a shelf. A rabbet is a square channel cut along the edge of a board, usually used to create a recess for a back panel or to join the sides of a box.