

Using a sharp tool is the fastest, safest, and most satisfying way to work with wood. No amount of skill can overcome a dull edge. This guide walks you through every part of sharpening, from the basic angles to the different types of stones, so you can achieve and maintain a razor-sharp edge on all your hand tools. If you want a complete overview of all the gear used to cut, shape, and join materials, make sure you check out our main page on Woodworking Tools.

Understanding Tool Sharpening: Why, What, and How It Works
What is Tool Sharpening?
Sharpening a tool means you remove tiny bits of metal to create a new, perfectly straight, and extremely fine cutting edge. You use an abrasive material, like a stone or sandpaper, to grind and hone the metal until it is sharp enough to slice through wood fiber cleanly.
Why Sharp Tools Matter in Woodworking
Sharp tools are the most important part of successful woodworking. If a tool is dull, your work will be harder, messier, and much less safe.
- Enhanced Safety: A sharp tool cuts easily, which means you do not have to force it. When you force a dull tool, it can slip, causing injury. A tool sharpener is a safety tool!
- Improved Precision and Finish: Only a truly sharp edge can slice wood fibers without tearing or crushing them. This leaves a smooth, shining surface that looks great and requires less sanding.
- Increased Efficiency and Reduced Effort: A sharp plane glides over the wood, and a sharp chisel bites exactly where you want it to. This saves you time and physical effort.
- Extending Tool Lifespan: Sharpening removes only a tiny bit of material. Keeping an edge sharp protects the tool from damage caused by using it when dull.
The Anatomy of Sharpness: Angles, Grits, and Edges
Understanding Bevels and Grinding Angles
The bevel is the sloped face of the tool that forms the cutting edge.
- Primary Bevel vs. Micro-Bevel: The primary bevel is the main angle you grind into the tool. A micro-bevel is a smaller, steeper angle honed right at the very tip. Using a micro-bevel makes sharpening faster because you only polish a tiny area of steel.
- Common Angles for Woodworking Tools: Most chisels and plane irons use an angle of 25∘. Some plane irons, especially block planes for working on end grain, use a low angle around 20∘.
The Role of Abrasives: Grits Explained
Grit describes how coarse or fine the abrasive material is. It tells you the size of the tiny particles on the stone or sandpaper. A lower number means the grit is rough and coarse; a higher number means the grit is fine.
| Grit Range | Grit Number Example | Primary Purpose | Resulting Surface |
| Coarse | 100 to 400 | Fixing chips, reshaping a broken edge, or grinding a new primary bevel. | Leaves deep scratches; removes material fast. |
| Medium | 800 to 1200 | General sharpening and creating a consistent, clean bevel. | Removes scratches from the coarse stone. |
| Fine | 4000 to 8000 | Honing the micro-bevel and polishing the edge. | Leaves a near-mirror finish. |
| Ultra-Fine | 10,000 and up | Final polishing on the stone, followed by stropping. | Creates a true razor edge. |
Achieving a Burr or Wire Edge
When you sharpen the bevel side of a blade, you push metal from that side to the back of the tool. This creates a thin curl of metal on the back edge, which we call a burr or wire edge. You must feel this burr along the entire edge of the blade to know that you have fully met the bevel and made the edge as thin as possible.
Stropping and Polishing for Razor Sharpening
After the finest stone, the edge is sharp but still has small scratches. Stropping means lightly dragging the back of the blade across a piece of leather that has a fine compound on it. This removes the burr and polishes the edge, giving it the final, razor-sharp shine.
Types of Sharpening Tools and Systems for Woodworkers
Sharpening tools, sometimes called a sharpener tool or a carpenter’s sharpening tool, come in many different forms.
Abrasive Stones
- Waterstones (Natural and Synthetic): These stones use water as a lubricant to float away the removed metal. They cut fast and offer a beautiful final polish. You need to flatten them often.
- Oilstones (Novaculite, Arkansas Stones): These stones use oil as a lubricant. They cut slower than waterstones but hold their flat shape much longer.
- Diamond Stones: These are steel plates covered in industrial diamonds. They cut very fast, stay perfectly flat, and do not need oil or water, though liquid helps clean them.
Sharpening Guides and Jigs
- Manual Honing Guides for Chisels and Plane Irons: These devices hold the blade at a perfect, set angle while you move it across the stone. They are excellent for beginners because they guarantee you keep the angle steady.
- Angle Setting Jigs and Gauges: These simple metal or plastic guides help you quickly set the blade in your honing guide to the correct 25∘ or 30∘ angle.
Powered Sharpening Systems
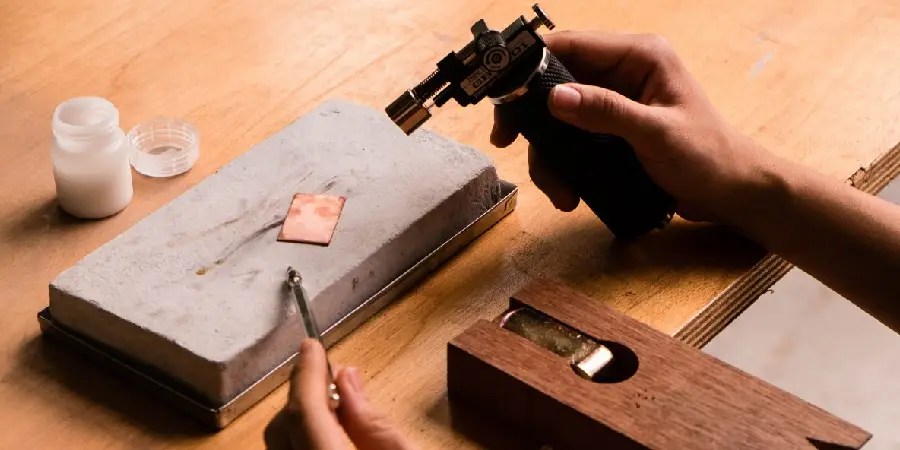
- Bench Grinders (Dry Grinders): These spinning wheels remove metal quickly to fix a chipped edge or set a new primary bevel. They create heat, so you must dip the tool in water often to prevent overheating and ruining the steel’s temper (hardness).
- Wet Grinders (e.g., Tormek-style systems): These use a large stone that spins slowly in a water bath. The water keeps the tool cool, and the slow speed gives you more control. They are great for complicated shapes like carving tools.
Stropping Materials
- Leather Stropping Compounds: These compounds are rubbed onto leather to make a super-fine final polish.
- Honing Pastes and Compounds: These are waxes or pastes with ultra-fine abrasive particles, often measured in microns.
Sharpening Aids and Accessories
- Flattening Stones and Diamond Plates: Stones wear down and become hollow over time. You use a flattening stone, or a diamond plate, to make your sharpening stone flat again. This is essential for straight edges.
- Magnifiers and Edge Checkers: These small lights or magnifying tools let you look closely at the cutting edge to see if you have fully removed the scratches from the previous grit.
Essential Woodworking Sharpening Tools: A Closer Look
- Chisels (Bench Chisels, Mortise Chisels, Carving Chisels): Bench and mortise chisels are sharpened using a flat stone. Carving chisels, which have curved edges (gouges), require special slip stones that are shaped to fit the curve of the tool.
- Hand Plane Blades (Bench Planes, Block Planes, Specialty Planes): Sharpened just like a bench chisel, but the blade can be wider and must be perfectly flat and straight for smoothing planes.
- Spokeshaves and Scrapers (Card Scrapers, Cabinet Scrapers): Scrapers are sharpened by creating a sharp, curled edge called a burr using a tool called a burnisher.
- Hand Saws: Sharpening hand saw teeth is a specialized skill that uses tiny, shaped files. Most woodworkers send their saws to a professional sharpener.
How to Sharpen Specific Woodworking Tools: Step-by-Step Guides
Sharpening Bench Chisels
- Preparing the Chisel for Sharpening: Check the back of the chisel. It must be perfectly flat, especially near the edge. If the back is not flat, the tool will not cut correctly.
- Honing the Micro-Bevel on Stones: Use a honing guide to set the angle and slide the chisel back and forth across your progression of stones (e.g., 1000 grit, 4000 grit, 8000 grit). Use a constant, steady pressure.
- Achieving a Burr: Keep sharpening until you feel the wire edge (burr) across the entire back of the blade.
- Stropping for a Hair-Shaving Edge: Lay the back of the chisel perfectly flat on the finest stone, and give it one or two light passes to remove the burr. Then, lightly pull the bevel and the flat back across your leather strop.
Sharpening Hand Plane Blades
- Ensuring a Flat Back: This is even more important than the bevel. Spend time on the flattening plate to make the back truly flat.
- Honing the Cutting Edge with a Jig or Freehand: Use a jig to set the bevel angle accurately. Use the same grit progression as with chisels.
- Addressing Curved Plane Irons (e.g., Jack Plane): Irons for jack planes are often sharpened with a slight curve, or camber, across the width. This prevents the plane from leaving grooves in the wood.
Sharpening Scrapers (Card Scrapers)
- Flattening and Squaring the Edges: Use a file or stone to make sure the scraper’s four edges are perfectly flat and square (90∘).
- Creating and Turning the Burr with a Burnisher: Clamp the scraper in a vise. Use the smooth, hard steel burnisher to push and curl a hook (the burr) along the edge. This hook does the cutting.
Sharpening Techniques and Best Practices
Freehand Sharpening Techniques
- Developing Consistency and Muscle Memory: Freehand sharpening means you hold the tool in your hand, using only your fingers and wrist to maintain the angle. This takes a lot of practice but gives you the fastest sharpening time.
- The Ruler Trick for Back-Beveling: Putting a thin ruler under the tail of a blade while sharpening the back slightly raises the edge. This creates a tiny back-bevel, which helps the blade cut better and makes the flat back easier to manage.
Guided Sharpening with Jigs
- Benefits for Beginners and for Reproducibility: Honing jigs take the guesswork out of holding a consistent angle. They are the best way for a beginner to get a truly sharp edge right away.
- Proper Setup and Use of Sharpening Jigs: You must set the amount the blade sticks out of the jig exactly right to get the correct angle.
Dry vs. Wet Grinding
- Managing Heat Build up to Prevent Temper Loss: Grinding steel on a dry wheel creates a lot of heat. Too much heat will turn the steel blue or straw-colored. This means you have softened the steel, and it will no longer hold a sharp edge. Always dip the tool in water often when grinding to keep it cool.
Choosing the Right Sharpening System for Your Needs
Beginner-Friendly Sharpening Solutions
The best place to start is with a diamond plate (for flattening and coarse work) and a single, fine waterstone (around 4000 grit) along with a honing guide. This system is relatively clean, easy to learn, and produces great results quickly.
Advanced and Professional Sharpening Systems
Systems like the Tormek wet grinder or dedicated sharpening machines offer speed and repeatability for those with many tools or who sharpen often.
Maintenance and Care of Your Sharpening Tools
Flattening Waterstones and Oilstones
You must regularly flatten your stones. Place the stone on a flattening plate or coarse diamond plate and rub it in circles until the stone’s surface is perfectly flat again.
Cleaning and Storing Sharpening Stones and Jigs
Clean your stones after each use to remove the metal particles. Store your tools and jigs in a dry area to prevent rust.
Safety First: Sharpening Tools Safely
Personal Protective Equipment (PPE)
Wear safety glasses when using a bench grinder to protect your eyes from sparks and metal fragments.
Proper Handling of Sharp Tools and Sharpening Equipment
Never lay a freshly sharpened tool on the bench where you might accidentally grab the cutting edge. Treat all sharp tools with respect and care.
Machine Safety for Powered Sharpeners
Always follow the manufacturer’s rules for power sharpeners. Never wear loose clothing or gloves around a moving grinder or wheel.
Conclusion
Sharpening is not a chore; it is a core woodworking skill. Learning to sharpen allows you to work safer, faster, and with greater pleasure. With practice and patience, you will master the art and enjoy the rewards of a perfectly sharp edge on every project.
FAQ: Common Sharpening Questions
What is the best grit to finish sharpening with?
For a true, high-quality, razor-sharp edge suitable for fine woodworking, you should finish with an abrasive that is at least 8000 grit. Many woodworkers also finish by using a leather strop treated with an ultra-fine compound.
What is a woodworking sharpening tool set?
A basic beginner sharpening set usually includes:
– A dual-sided waterstone (e.g., 1000/6000 grit).
– A simple honing guide or jig.
– A flattening plate (or another diamond plate) to keep the waterstone flat.
Is it necessary to flatten my sharpening stones?
Yes, it is absolutely necessary. Sharpening wears down the middle of a stone faster than the edges, creating a hollow. If you sharpen a straight blade on a hollow stone, the resulting edge will be curved and will not cut correctly. A flattening stone or diamond plate corrects this.
How often should I sharpen my tools?
You should sharpen a tool as soon as it feels difficult to use. A dull tool needs force, and that is your cue. For fine work, you might only need to strop the edge every 15 minutes. For heavier work, you sharpen when the tool requires too much effort to cut cleanly.